Saturday, April 2, 2011

DeTail of Two Models

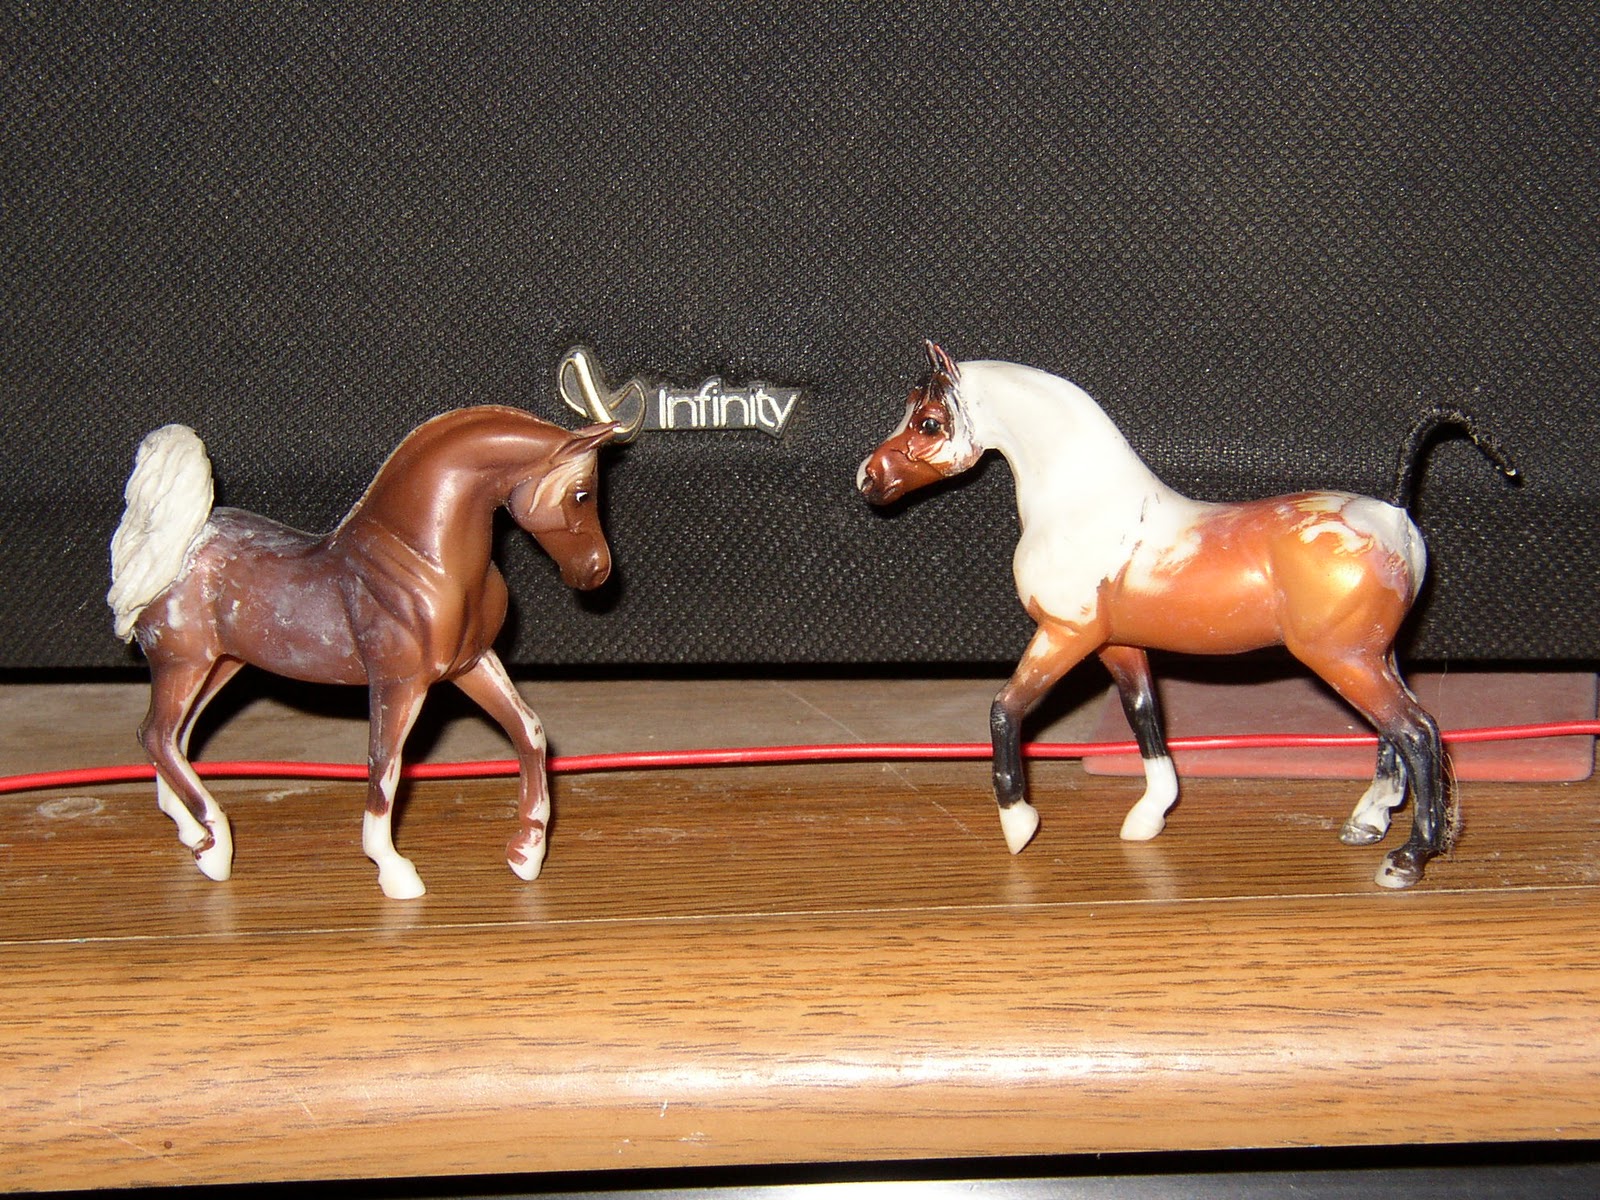
I have had one custom (G3 Highland Pony) sitting around waiting to have her hooves finished. And two others ( G1 Arabian Mare and G4 Driving Horse) awaiting their markings, that like to hang out with her.  It's the latter two that are pictured here:


I purchased both of these guys already prepped and primed. They don't photograph very well as the flash really washes out all of their nice shading. While they may look it, they aren't the same color. I'd initially intended the Arab to be bay and early on in the pastel dusting process, she adamantly stated that she wanted to be a chestnut. I kept going with plans of a bay (note her dark knees and unpainted legs; these were intended to be black) and finally she'd had enough; I stopped the dusting process immediately. She only had 2 coat of the acrylic base on her m/t when I took this photo today.  The Driving Horses beside her too, is chestnut, tho a much brighter shade. She is in the process of getting her blanket put on in this photo. I had initially penciled in a "roan" blanket and went back over it with thinned white paint. Tomorrow I'll post pix of the finished G3 Highland Pony.

Friday, April 1, 2011

Old School Tool

Woo hoo! What a sucky (cold, rainy) April 1st. At least around these parts... I set to work hacking up another critter today with my trusty coping saw. This tried and true implement has been with me for a very long time.


Here, held aloft with a pre-made, twisted wire "spine," I've used Ye Olde Coping Sawe to frame my on-site foreman, Mojo. Due to CTS in both hands, I can't hold the stupid thing very long to saw with it, so I've developed the following alternative approach:


I hold it between my knees while using both hands to, instead of holding the saw, hold the object to be hacked (which in this case is the neck). Worx like a charm.  So then I stuck in the pre-made spine mentioned earlier to connect the itty bitty head to the itty bitty body from whence it came, like so:


Then he got a neck form roughed in like so:


Now this is just to give me an idea of what he needs in terms of a neck... I dunno if I'll trim a bit along the crest or not... Tho in looking at him now, I've decided to braid his mane and tail in sculpted floss and leave the Pooky Lipped QH gelding in western dress. Maybe a nice banded mane...? Dunno....

And here is my second G2 CM QH:


Being as how this guy is intended to be a Foundation Type Appaloosa, I'm going to whack his head off at some point and shorten that neck a bit. I really don't care for the turn in the neck of this mold and once I redid him into a canter, it seems the curve is much more pronounced, or at least much more noticeable now. I don't know how other peeps do it, but I've never had any luck taking pictures of horses (real or otherwise) facing me without them looking like some weird kind of bubble-headed balloon float. And that fact alone has necessitated the change in this beastie. I think the length of that neck's more noticeable in this photo:


In my mind, this does not a Foundation Appaloosa equal! Stay tuned...


Thursday, March 31, 2011

Hmmm... Go figure....

A body just naturally tends to think that a one-eyed artist would stick with the larger models, ya?  At least larger than the 5" mark. Especially when that very same artist, used to prefer working on a larger victi--err... models. Au contraire! I find that I'm becoming hooked on minis... Go figure... I honestly don't know why I've been bitten by the mini bug. My current theory is that, during my hiatus from the hobby, I sold off a lot of my critters and what I didn't sell got thrown away (no worries, they were just bodies in all stages of customization), thereby downsizing tremendously. Since, like a druggie with a habit, I just could not leave the models alone, I cracked and acquired four Traditionals. Did I mention that I downsized? Well, it wasn't just with models... it was with living space, too. I have wayyy too much non-model stuff (not to mention the tons of models yet still packed up) with no where to put any of it (them). Walking through our house is very much akin to traversing a mine field; if you do it, you may be hurt. So to conclude my lengthy explanation, I believe I'm gravitating toward the minis due my space constraints.  And with that said, here's what I'm doodling with currently.


This guy is intended to be a nice loping WP type Appy gelding with a thin mane and rat tail ...


 Two Arabian stallions eyeballing each other... Both have had their feet refined a bit, tho the chestnut's only getting a resculpted tail. The bay (on the right) is now standing with his head extended and is going to have sculpted floss m/t.


Jumper and foal, both with heads slightly lowered. Both will have a sculpted floss M/T, tho the jumper will be braided.


 Mustang with a new sculpted m/t and cleaned off legs.


QH gelding with head dropped and pooky lip. Contemplating braids on this one, too...


Stone Pebbles Stock Horse CM into an Iberian type (Andalusian? Lusitano? Who knows...) This poor old guy has resided, in this basic shape, within my body box since this particular mold came out. I have tried to sell him unfinished several times with no takers. Since I think he looks kewel, I decided to finish him myself (I mean, it was my stupid arse that decided to work on the minis, ya?). His tail is just roughed in at this point and hanging off his booty by the twisty-tie used to create the initial form. Can you say lazy? But in my defense, it's wonderfully twisty (duh, it's a twist tie after all. Go figure...) and I can change my mind quite a bit about his tail carriage without any worry of the wire breaking.

Wednesday, March 30, 2011

Fleas!

Being from The Old School of Model HorseHacking, I see what was once a "cutting edge technique," becoming somewhat antiquated, for lack of a better word. Back in The Day, the favored method for applying fleabites was by using a tooth and/or paint brush loaded with skim-milk consistency paint, and flicking or splattering said bites onto the lucky recipient (i.e. model horse). In the midst of what's placed on the show table today, these splatter-painted guys tend to be overlooked in favor of much more detailed models. So with that said, below are my first attempts at penciled fleabites.


Both of these boys were dusted with super-pale mixes of pastel dust and mica powder, which progressively got darker (minus the mica powder) with each application. Believe it or not, the LB TWH resin was the more difficult of the two, as far as using colored pencils go... With the SM, I just tapped and tapped and tapped, following the direction of the hair growth. With the LB, I had to invest a bit more time in placing pencil to model, to avoid that pesky Been-Painted-By-A-Coke-Addict-With-A-Nervous-Tick look.


 I've also found that these models require lots of layers of protective spray, at least for me, as I tend to place aforementioned beastie on my lap as I work and just that slight contact causes the bites on the opposite side to smudge, fade and disappear altogether.

Will be posting photos of these boys when they get their hair done, tho as of this minute, I'm still undecided as to colors.

Thursday, December 2, 2010

Feeling Fettered


I finally patterned the granite (yellow) gecko (eyes are unfinished in pix) and I'm thinking that 
I prefer the dry-brush-on-black method. 


It allows me a bit more artistic freedom in creation of these critters. I use realistic patterns to closely base my design and create my own color schemes. Those geckos seem to pop
and attract the eyes more than the realistically painted granite gecko (which btw, is a
tangerine leopard gecko). I still have the two "pale-belly" geckos that I will now  
definitely paint in oils.

Wednesday, November 10, 2010

My ticket-picking nature (painfully) makes for some meticulously detailed geckos..

I have been thoroughly smitten with geckos since I was a child but don't think I remembered that until I saw the Geiko gecko. In fact, in studying the critter for sculpting, I became so enamored of them, that I've been thinking of adding a gecko to the family. I do love my critters!

I start a lot of my pieces covered with black clay; they're all sculpted in relief and later hand-painted. The results can be very dramatic as shown with the potion bottle below. This is an example of a piece that was covered with individually sculpted and textured black clay elements. 


 I started this same process with my geckos and while some of my latest itty-bitty lizards were by far better than any before (I even got all 5 of their toes this time!), the geckos still could be better... A fact that I decided after much researching and web browsing and window shopping and convincing myself that I need one.  It was in trying to decipher how to realistically portrait their gorgeous coloring. All of these little guys had white, pale or pastel bellies, where as my critters' bellies are as black as the inside of a cow. And you can see it too, if you care to flip it up and have a look, tho in this case bottom gecko looks like his got his best biker pants on!


BTW no, I've never poked my head in a cow's innards, nor would I like to; in any innards for that matter! I just imagine it'd be pretty darn dark in there.

So my latest foray into the gecko-making are tiny potion bottles made from recycled insulin bottles. I have created three gecko bottles using the black clay base method. One is a granite urn, one is old wooden slats, and the other is river stone. All the geckos were initially black, but after the whole big Pale-Belly-Fiasco (which of course, came post baked gecko), I decided to just paint the little farts "pale belly." The granite gecko has been painted wet on wet with minimal dry brushing.

It's hard to see the colors as the flash has just about bleached them away.


The other two, I just wised up and painted them as evenly-covered "pale belly" as I could get them. The wood gecko is our lucky model.  I'm planning on perhaps trying oil on one or both of them.


I'm planning to change the gecko color next time from black to some sort of custom mixed translucent and go from there. More on that when I get the nerve.