Saturday, May 7, 2011

Itty-Bitty Ear Project

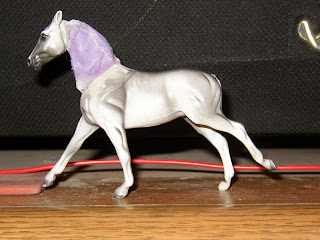
Ever wonder what happened to my earless stablemates? Well, they've been setting around waiting patiently for me to get up off of my arse and figure something out. At first, I was going to try Laura Skillern's nifty method, but the tutorial was for traditional ears and the idea of trying some so much smaller was daunting to say the least. (I really dislike making ears) Then I decided to just eighty-six that idea and to make them out of superglue and baking soda. I'd planned on the "Blob Approach..." You know, just making an ear-sized blob and whitlin' that sucker down with my trusty carbide scrapers and jewelers files. Wellllll..... I eighty-sixed that one, too. So, back to the first method from Laura. And here's the result:

This is before I cut the long tail-like ends off

So I'm still procrastinating attaching them; hopefully I'll attempt that today. Keep your fingers crossed that I don't wind up with critters that look like the bastard children of bunnies.

On a different note, here is the Stone Chips Andalusian that was also purchased prepped and primed.


Now I might be prejudiced, but I think this critter's awesome. His body color ranges from wheat gold to black, with russets, caramels and yellows used. He's got lots of bells and whistles and is for sale in my Webshots Album (as of today, I have been unable to upload photos to Webshots, but I'll keep trying so check back often). I also have a resin rider for uber-cheap and a pretty nifty hunter/jumper jump in Traditional size (which also has fallen victim to the ailments of Webshots).  Stay tuned... I may have ears with models attached soon.

Friday, April 29, 2011

Bettie Boop

Years ago my grandmother bought me a 4-book set of Thelwell's Pony cartoons and I remember reading and re-reading those books until I had pretty much worn them out.  There is one toon in particular that, while I don't remember the specific book that housed it, has stayed in my mind to this very day.  In fact, I think about it every single time I go riding. There are two sketches actually... The first one depicts a very neat, tidy and sharply-dressed young girl eying an extremely dirty, hairy, just plain messy looking pony. And in the next drawing, the pony is so clean and shiny and braided nicely for show, while the young girl is sweaty, dirty and just plain messy looking. I always feel that child's pain whenever I'm brushing my mare for a ride (she thinks she's a pig and is always covered in mud). It is this cartoon that's inspired my newest idea: Bettie Boop. Bettie is going to be a very well-turned-out show pony for someone and this is her story... 

Here is my recently received almost-conga of (4) G2 Shetland Ponies.  

Bettie is on the last one in the line...


I decided that I wanted this little girl to be, despite her pudgy self, in a very light and floaty trot, with her head on the bit and both ears on her rider. Since I've planned to braid her mane and tail, as well as move her ears, the entire hair-do had to go. I should've used The Old School Tool instead of the cutting wheel on the Dremel as I burned my stupid self plucking hot plastic off Bettie's neck. Since I planned to tuck her head anyway, I didn't really need that neck. Her head is so tiny however (and with no ears), that I tried to save myself a bit of a headache by cheating and leaving a portion of the original plastic neck for proportional reference.

I got a bit carried away with the Dremel and cut her neck almost completely off!
I also notched her joints so that she could be moved into a more correct trot and refined her blobby joints a bit and removed her fetlock feather. Unfortunately in carving her hooves, the pressure caused her left-fore to pop off and I had to insert a pin for support. Later I'll sculpt a new foot for that leg.

She's going to "float." Tho I've not decided how I want to achieve this... Pins? Clear Pegs?
I use aluminum foil to give me a form with some body (that will easily hold shape) when I'm filling large amounts of empty space and cement it into place with super glue (liquid) and baking soda. First I line the seams where the foil meets the plastic (it's a lot like sealing the seams on a tent) with the glue then dust copious amounts of baking soda on top. I usually pat the soda down on top, then gently dust it away (I get really sticky with glue if I don't proceed with caution here). The last fine layer I blow off and presto! Instant fix! I keep adding glue and soda in layers until my "armature" suits me.

Pitiful looking little critter isn't she?


Here she is after her first application of putty.


I still have the sides of her head to grind off in order to make room for the ears. I'll prolly have to start on those ears next thing, which is definitely something to which I do not look forward. I did manage to find an excellent tutorial on making ears (here: http://donteatthepaint.blogspot.com/2011_03_01_archive.html) by Laura Skillern, but unfortunately I am having no luck with it on a SM scale. So my plan is to try the blob approach... You know..? Put an ear-shaped blob on the afflicted critter and carve away. I'm thinking about using straight pins as supports due to my enthusiastic approach to carving ears tending to pop them off. Then there are her legs and feet still needing some beautifying, and the left front leg still needing a finished hoof.


Friday, April 22, 2011

Just Got Spotted

I just got this little critter done, hence the name....


I do love this mold but it sure does have some thick little legs! I honestly thought I'd never get finished painting this thing and can say that my urge to paint super detailed white markings has been well-appeased.  Her pictures aren't the best (they actually suck) as I just plunked her down on an unfinished base and proceeded to take mug shots on the front porch using the gloomy day as our back drop. Tho overcast days are usually far more kind to the models' color, I've found.  This girl is for sale in my webshots album.

Tuesday, April 19, 2011

The Babysitter

Anyone who's had the privilege of learning to ride on an older, well-mannered and patient mount, will definitely understand the term, "Babysitter." My babysitter was a small Paint mare by the name of Lady. My Mom, when she graduated high school, instead of buying a car with her graduation money, purchased herself a horse; Lady. By the time I came along, Lady was in her late teens and by the time I rode her, in her early twenties. The old mare put up with a lot out of me, including riding with my tape player tied to the saddle with my leg thrown over the saddle horn, while we traveled along the road that runs by my house. Lady is who taught me how to mount up like the Lone Ranger.  In case you're not old enough to have seen him, the LR used to mount his trusty steed, Silver, by running up behind the horse and vaulting up over his butt to land right in the saddle.  It takes a very special horse to stand rock steady while you run all out at full speed, directly into their blind spot, only to pop them flat-handed on the booty before leaping onto their back. And she stood like that through many, many attempts... So this particular project is inspired by and dedicated to my babysitter, Lady, and all the other babysitters like her.

My victi--err... base model was a G3 Stock Horse Mare.  First thing I did was decide on her position. I wanted her to have her head turned and lowered, as if she were listening to a cue from her rider, or receiving an apple from a friendly hand. So I chopped a large wedge out of her neck, leaving only a thin strip in the front where her windpipe is.

My pre-melted windpipe picture was grossly blurred, so here she is after her appointment with the lighter.
While I like this model, I also have a few problems with her... First of all, she really has a "Spirit, Stallion if the Cimarron," feel to her, so I set about correcting it. After removing her tail and whittling away at her bubble-butt. I also reshaped her topline a bit and added a crease between her hips, as is common for stock horses. Second thing is that ugly ole head, especially with those psycho eye-whites... I refined her muzzle a bit as well as carved/resculpted her jaws. The pooky lip is in the works; putty will be added to define it a bit more.
(I keep seeing that same streak in all of my photos *grrrrr*) I need to remember to clean my speaker off!
Here's girlie with her head tucked and neck filled in with aluminum foil and baking soda. I still have that wonky leg to fix (will prolly do that last thing) and adding the ears (this particular girl came to me without one, so I just lopped the other off). I also filed her feet a bit as I dislike the lumpy way her legs adjoin her hooves. And as I sit here studying her photo, I've decided that her right hind is really bugging me, especially now since her tail's been removed. After checking it, I found out that it's a bit shorter than the left, so now I'm seriously debating whether I want to chop it off and shorten it or not.

And after first application of putty.

Still needs to have ear room sanded into her head. (Please overlook the cat hair all over her; I can never seem to get it all up)
I'm still trying to make friends with that right hind... Even from this angle, it;s hard for me to ignore, so I'm thinking tomorrow, before she gets her ears, I'll shorten her leg at the gaskin and while I'm at it, I plan to set that leg back a bit, too.

Sunday, April 17, 2011

Nez Perce (G1 SMND)

This fellow is the biggest PITA that I've worked with in a while, insofar as removing a tail.

Another that came to me with a broken leg...

I wanted to lower this critters neck, but still wanted to keep the beautiful lean lines of the original piece, so I whacked it off and trimmed it a bit. I also started resculpting the "lail" (or "teg," either way, it = leg + tail) into something more like a leg. And as I whittled away, I remembered why I don't CM Native Dancers too much (tho I do love this mold). I suppose this critter's lack of mane should, in some small way (not!), make up for the major chore of lail-resculpting.

As I was working on this fellow, he took a plunge off the shelf and broke both of his ears... I guess it's time for me to learn how to make stablemate sized ears, ya?
As I was sanding and cutting away at the mass of plastic between those back legs, I inadvertently used that left-fore for leverage and popped it off again. At this point I gave up and just used a clipped-off straight pen as an armature. In the photo below, you can kinda get an idea of what a chewed up mess his patootey is...

Still tons of plastic to carve out and off...
Got the first layer of putty added and made something closer to a bone for that missing front leg.


The head still has to be filed for ears and I need to work on making sure that entire neck looks harmonious. Right now getting the putty to blend smoothly in the negative spaces is aggravating, hence the layers. Still have the lower leg to work on too, so I'll prolly build that gradually as I go (I tend to crack under pressure and if I know that I don't have to rush and will have another "putty session" at my leisure, I tend to not flub it so badly!)

Friday, April 15, 2011

East and West

I finally got the first layer of putty on the G2 Quarter Horse...
Foundation type Appaloosa with rat tail and thinned mane


...and the G2 Thoroughbred.
Polo Pony with braids and a mud knot.

These fellows have pictures of their sorry selves somewhere else among the earlier pages here... This is just the first application of putty, hopefully the finer stuff can be done on the second application. (Epoxy putty and I have a love/hate relationship. It's not unusual for me to have to really psych myself up for a day or two before even breaking out the putty. That's because while I love the results, I sincerely and deeply dislike handling the stuff during application. BLUCK! PTOOEY!!) Still have a way to go on both... The stock horse needs some more work on his hip and flank area, as well as finer detailing on his forehead and boy bits. The polo pony needs the messed up back hoof doctored a bit more as well as work on his/her/it's (undecided there) neck and shoulders (don't like the way they adjoin).

My plan here is to attend the major parts (missing muscle masses due to moving and/or removing of bits and pieces) first and when they're up to snuff, I'll tend to the finer things (such as wrinkles, pooky lips, nostrils, faces, etc). More photos to come as they progress.

Monday, April 11, 2011

Woo-hoo Frosty!!

Finally! My Moon Frost is done! I ordered three of these little guys (love this resin!) and finally managed to get one painted.


He was painted the exact same color as the G3 Friesian, tho unlike the stablemate, this fellow got the chestnut mane and tail. It's amazing what a difference mane and tail color can make.

I recently purchased 4 G2 SM Shetlands and am planning to chronicle the entire customization process from beginning to end on all of them.

Friday, April 8, 2011

Instant Gratification

If you are into instant gratification (like myself), customizing models in any way, is not for you. This is my newest theory as to why I develop certain dislikes for a particular model. Thankfully, ye olde Friesian didn't fall into that category, tho he sure did take a lot of work and layer after layer after layer of white paint. And therein lies the rub; it's the amount of time it takes to put on the ultra-smooth, highly detailed and realistically patterned topicals, that grate on my last nerve.

 
I tried something a bit different with this guy. I painted his leg feathers in with obscene amounts of thinned white paint, following the hair growth pattern. Since I wanted him to look like he's been living in the pasture, I attempted to portray the dirty leg feather that real-horse owners dread! Unfortunately, he leaped from the noose in which I'd hung him for spraying and on the way down, chipped his ear tips. I find that, for me at any rate, oil is far superior to any other type of paint in this aspect (and a few others). Oil paint, at least what I've used, seems to "scuff" more so than "chip." Due to the many layers of sealer involved in the painting process with pastel, the chips are exactly that: chips. So that, besides having to replace the color, the ear surface level needs to be corrected as well. But then again on the bright side, it does push me to develop new fixes for the problems! His ears have been attended and he is for sale; more pictures in my Webshots Album.

Tuesday, April 5, 2011

Whisper

Well here she is:


I had initially wanted to paint this mare a red bay rabicano, but as I was progressing through my color hues, I heard whispers. Okay now, I'm not crazy (at least not officially anyway), but I did have this ever-increasing intuition (very much akin to the whispers we hear in our mind; our conscience is an example) that this critter wanted to be chestnut. So in a nut shell, she whispered to me. Hence the name.... I purchased her already prepped and primed by Martha Wells, who also gave her a new mane. It's hard to tell with the flash and lousy indoor photo but she's loaded with detail and is for sale. She's listed in my webshots album.

As for what's cookin... I have two more that need details to finish them up (G3 flea-bitten Friesian and G4 Driving Horse in bright chestnut with a spotted blanket), 2 that are getting primed (G3 Mustang and G2 Stock Horse) and many more in all stages of chopped-upedness. Hopefully I can get the Friesian posted tomorrow.

Sunday, April 3, 2011

New Pony!

I am so pleased to finally have finished this mini. She's been hanging around the studio for a couple months in only her body color; I just could not get the G3 Highland Pony Fire stoked and burning under my patootey. And now, tah-dah!


Okay now, I know that it's not like I painted the Mona Lisa or anything. But sometimes I lose momentum with a certain creation (no matter what it is), occasionally to the point of dislike. In rare instances, the dislike grew until I despised a few, which were then promptly sold.  Weird, ya? I think so, too. O well, what we can't change we learn to bear gracefully, ya? So I'm stoked because not only did I finish her, but I still like her. Anyhoo, for those interested, the G3 Highland Pony is for sale. More photos can be seen here: http://home-and-garden.webshots.com/album/579947304GFeUee

Saturday, April 2, 2011

DeTail of Two Models

I have had one custom (G3 Highland Pony) sitting around waiting to have her hooves finished. And two others ( G1 Arabian Mare and G4 Driving Horse) awaiting their markings, that like to hang out with her.  It's the latter two that are pictured here:


I purchased both of these guys already prepped and primed. They don't photograph very well as the flash really washes out all of their nice shading. While they may look it, they aren't the same color. I'd initially intended the Arab to be bay and early on in the pastel dusting process, she adamantly stated that she wanted to be a chestnut. I kept going with plans of a bay (note her dark knees and unpainted legs; these were intended to be black) and finally she'd had enough; I stopped the dusting process immediately. She only had 2 coat of the acrylic base on her m/t when I took this photo today.  The Driving Horses beside her too, is chestnut, tho a much brighter shade. She is in the process of getting her blanket put on in this photo. I had initially penciled in a "roan" blanket and went back over it with thinned white paint. Tomorrow I'll post pix of the finished G3 Highland Pony.

Friday, April 1, 2011

Old School Tool

Woo hoo! What a sucky (cold, rainy) April 1st. At least around these parts... I set to work hacking up another critter today with my trusty coping saw. This tried and true implement has been with me for a very long time.


Here, held aloft with a pre-made, twisted wire "spine," I've used Ye Olde Coping Sawe to frame my on-site foreman, Mojo. Due to CTS in both hands, I can't hold the stupid thing very long to saw with it, so I've developed the following alternative approach:


I hold it between my knees while using both hands to, instead of holding the saw, hold the object to be hacked (which in this case is the neck). Worx like a charm.  So then I stuck in the pre-made spine mentioned earlier to connect the itty bitty head to the itty bitty body from whence it came, like so:


Then he got a neck form roughed in like so:


Now this is just to give me an idea of what he needs in terms of a neck... I dunno if I'll trim a bit along the crest or not... Tho in looking at him now, I've decided to braid his mane and tail in sculpted floss and leave the Pooky Lipped QH gelding in western dress. Maybe a nice banded mane...? Dunno....

And here is my second G2 CM QH:


Being as how this guy is intended to be a Foundation Type Appaloosa, I'm going to whack his head off at some point and shorten that neck a bit. I really don't care for the turn in the neck of this mold and once I redid him into a canter, it seems the curve is much more pronounced, or at least much more noticeable now. I don't know how other peeps do it, but I've never had any luck taking pictures of horses (real or otherwise) facing me without them looking like some weird kind of bubble-headed balloon float. And that fact alone has necessitated the change in this beastie. I think the length of that neck's more noticeable in this photo:


In my mind, this does not a Foundation Appaloosa equal! Stay tuned...


Thursday, March 31, 2011

Hmmm... Go figure....

A body just naturally tends to think that a one-eyed artist would stick with the larger models, ya?  At least larger than the 5" mark. Especially when that very same artist, used to prefer working on a larger victi--err... models. Au contraire! I find that I'm becoming hooked on minis... Go figure... I honestly don't know why I've been bitten by the mini bug. My current theory is that, during my hiatus from the hobby, I sold off a lot of my critters and what I didn't sell got thrown away (no worries, they were just bodies in all stages of customization), thereby downsizing tremendously. Since, like a druggie with a habit, I just could not leave the models alone, I cracked and acquired four Traditionals. Did I mention that I downsized? Well, it wasn't just with models... it was with living space, too. I have wayyy too much non-model stuff (not to mention the tons of models yet still packed up) with no where to put any of it (them). Walking through our house is very much akin to traversing a mine field; if you do it, you may be hurt. So to conclude my lengthy explanation, I believe I'm gravitating toward the minis due my space constraints.  And with that said, here's what I'm doodling with currently.


This guy is intended to be a nice loping WP type Appy gelding with a thin mane and rat tail ...


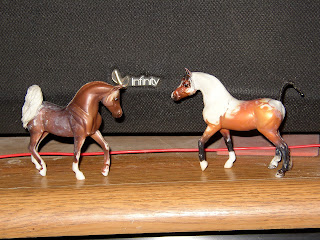
 Two Arabian stallions eyeballing each other... Both have had their feet refined a bit, tho the chestnut's only getting a resculpted tail. The bay (on the right) is now standing with his head extended and is going to have sculpted floss m/t.


Jumper and foal, both with heads slightly lowered. Both will have a sculpted floss M/T, tho the jumper will be braided.


 Mustang with a new sculpted m/t and cleaned off legs.


QH gelding with head dropped and pooky lip. Contemplating braids on this one, too...


Stone Pebbles Stock Horse CM into an Iberian type (Andalusian? Lusitano? Who knows...) This poor old guy has resided, in this basic shape, within my body box since this particular mold came out. I have tried to sell him unfinished several times with no takers. Since I think he looks kewel, I decided to finish him myself (I mean, it was my stupid arse that decided to work on the minis, ya?). His tail is just roughed in at this point and hanging off his booty by the twisty-tie used to create the initial form. Can you say lazy? But in my defense, it's wonderfully twisty (duh, it's a twist tie after all. Go figure...) and I can change my mind quite a bit about his tail carriage without any worry of the wire breaking.

Wednesday, March 30, 2011

Fleas!

Being from The Old School of Model HorseHacking, I see what was once a "cutting edge technique," becoming somewhat antiquated, for lack of a better word. Back in The Day, the favored method for applying fleabites was by using a tooth and/or paint brush loaded with skim-milk consistency paint, and flicking or splattering said bites onto the lucky recipient (i.e. model horse). In the midst of what's placed on the show table today, these splatter-painted guys tend to be overlooked in favor of much more detailed models. So with that said, below are my first attempts at penciled fleabites.


Both of these boys were dusted with super-pale mixes of pastel dust and mica powder, which progressively got darker (minus the mica powder) with each application. Believe it or not, the LB TWH resin was the more difficult of the two, as far as using colored pencils go... With the SM, I just tapped and tapped and tapped, following the direction of the hair growth. With the LB, I had to invest a bit more time in placing pencil to model, to avoid that pesky Been-Painted-By-A-Coke-Addict-With-A-Nervous-Tick look.


 I've also found that these models require lots of layers of protective spray, at least for me, as I tend to place aforementioned beastie on my lap as I work and just that slight contact causes the bites on the opposite side to smudge, fade and disappear altogether.

Will be posting photos of these boys when they get their hair done, tho as of this minute, I'm still undecided as to colors.